The Critical Path Method (CPM) is a project management technique developed in the late 1950s by Morgan R. Walker of DuPont and James E. Kelley, Jr. of Remington Rand. This method, which emerged concurrently with the Program Evaluation and Review Technique (PERT) developed by Booz Allen Hamilton and the U.S. Navy, revolutionized project scheduling and management.
Table of contents
Critical Path Method (CPM)
CPM is a project management tool that helps in scheduling tasks, managing time, and identifying the most critical activities that must be completed on time to avoid delays. By mapping out all activities and their dependencies, CPM identifies the longest sequence of tasks, known as the critical path.
Historical Background
CPM’s origins can be traced back to DuPont’s project management practices between 1940 and 1943, which significantly contributed to the Manhattan Project’s success. Kelley and Walker’s pioneering work led to the formalization of CPM, which has since become integral to managing various types of projects, including construction, aerospace, defence, software development, research, product development, engineering, and plant maintenance.
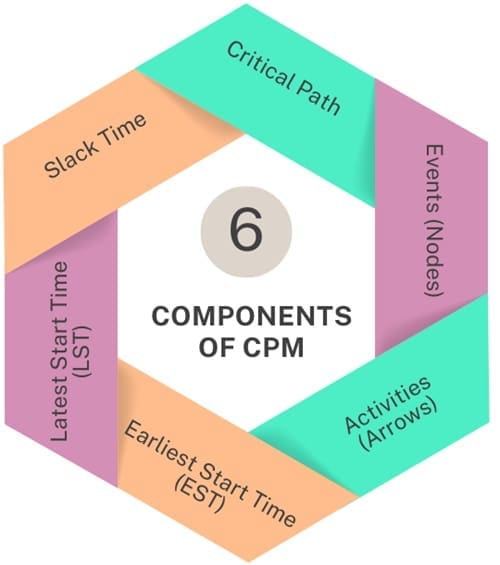
Components of CPM

- Critical Path: The sequence of activities that determines the project’s minimum completion time. Delays in any of these tasks directly impact the project timeline.
- Events (Nodes): Represent specific points in time where an activity starts or finishes.
- Activities (Arrows): The tasks that connect events, indicating the sequence and duration of operations.
- Earliest Start Time (EST): The soonest an activity can begin, considering the completion of preceding tasks.
- Latest Start Time (LST): The latest an activity can start without delaying the project.
- Slack Time: The amount of time an activity can be delayed without affecting the project’s completion date. Critical path activities have zero slack.
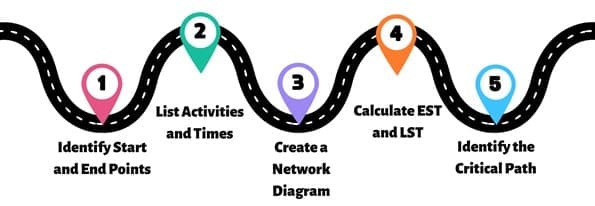
Steps to Determine the Critical Path

Step 1: Identify Start and End Points:
Define the initial and final events in the process. The initial event is where the project begins, and the final event is where it ends. These points set the boundaries of the project timeline and help in understanding the scope of the project.
Step 2: List Activities and Times:
Record the time required for each task and its dependencies. Identify all tasks that need to be completed within the project, note the time it will take to complete each task and determine any dependencies.
Step 3: Create a Network Diagram:
Draw nodes for each event and arrows for activities, indicating durations. Nodes represent events or milestones, and arrows represent tasks or activities with their respective durations.
Step 4: Calculate EST and LST:
Move forward from the start node to calculate the Earliest Start Time (EST). Start at the initial event and move forward through the network, calculating the earliest time each task can start. Move backwards from the end node to determine the Latest Start Time (LST). Begin at the final event and move backwards through the network, calculating the latest time each task can start without delaying subsequent tasks.
Step 5: Identify the Critical Path:
The path with the longest duration from start to end, where EST equals LST for all activities. The critical path determines the minimum project duration, and any delay in tasks on this path will delay the project’s completion. Tasks on this path have no flexibility in their start or end times.
Task Breakdown and Time Allocation
The manufacturing process involves several steps, each requiring a specific amount of time:
- Building Components:
- Legs: 11 hours
- Tabletop: 3 hours
- Drawer: 10 hours
- Painting Components:
- Legs: 2 hours
- Tabletop: 1 hour
- Drawer: 3 hours
- Assembly:
- Attaching drawer to tabletop: 1 hour
- Attaching legs to the assembled tabletop and drawer: 1 hour
Applying CPM to Table Manufacturing
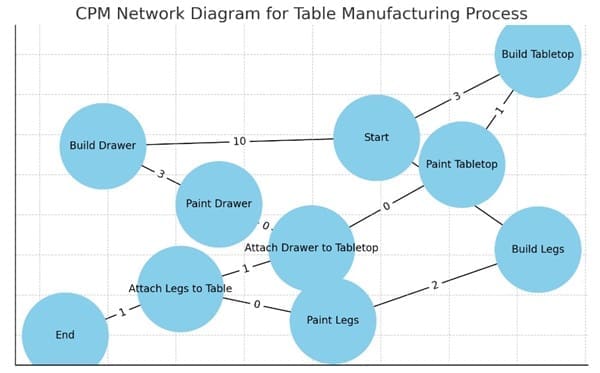
Let’s create a network diagram for the table manufacturing process:

- Build Legs:
- Duration: 11 hours
- Paint Legs: 2 hours
- Build Tabletop:
- Duration: 3 hours
- Paint Tabletop: 1 hour
- Build Drawer:
- Duration: 10 hours
- Paint Drawer: 3 hours
- Assembly:
- Attach Drawer to Tabletop: 1 hour
- Attach Legs to Table: 1 hour
Using these steps, we can draft the network diagram:
- Node 1 (Start)
- Activity A: Build Legs (11 hours) → Node 2
- Activity B: Build Tabletop (3 hours) → Node 3
- Activity C: Build Drawer (10 hours) → Node 4
- Node 2:
- Activity D: Paint Legs (2 hours) → Node 5
- Node 3:
- Activity E: Paint Tabletop (1 hour) → Node 6
- Node 4:
- Activity F: Paint Drawer (3 hours) → Node 7
- Node 6 and Node 7:
- Activity G: Attach Drawer to Tabletop (1 hour) → Node 8
- Node 8:
- Activity H: Attach Legs to Table (1 hour) → Node 9 (End)
Critical Path Calculation
- Identify Paths:
- Path 1: 1 → 2 → 5 → 9 (Build Legs, Paint Legs, Attach Legs) = 11 + 2 + 1 = 14 hours
- Path 2: 1 → 3 → 6 → 8 → 9 (Build Tabletop, Paint Tabletop, Attach Drawer, Attach Legs) = 3 + 1 + 1 + 1 = 6 hours
- Path 3: 1 → 4 → 7 → 8 → 9 (Build Drawer, Paint Drawer, Attach Drawer, Attach Legs) = 10 + 3 + 1 + 1 = 15 hours
- Determine Longest Path:
- The longest path is Path 3 (Build Drawer, Paint Drawer, Attach Drawer, Attach Legs) with a duration of 15 hours.
- Establish Earliest and Latest Start Times:
- For Path 3, the EST and LST will be calculated based on the following:
- EST for Node 1: 0 hours
- EST for Node 4: 0 hours (as it starts immediately)
- EST for Node 7: 10 hours (after the drawer is built)
- EST for Node 8: 13 hours (after the drawer is painted)
- EST for Node 9: 14 hours (after the drawer is attached)
- LST for Node 9: 15 hours (project completion time)
- LST for Node 8: 14 hours (1 hour for attachment)
- LST for Node 7: 13 hours (1 hour for attachment)
- LST for Node 4: 10 hours (3 hours for painting)
- For Path 3, the EST and LST will be calculated based on the following:
- Calculate Slack Time:
- Activities on the critical path (Path 3) have zero slack.
- Other paths have slack time equal to the difference between their total duration and the critical path duration.
Also See: Lean Six Sigma Training and Certification Programs, Public, Onsite and Online Training
Interpretation and Application
The critical path (Path 3) is the sequence of tasks that must be closely monitored to ensure the project is completed on time. Activities in this path are crucial and should be given priority. Delays in these tasks will delay the entire project. Conversely, activities with slack time can afford some delays without impacting the overall timeline.
Basic Technique of CPM
The core principle of CPM involves constructing a project model that encompasses:
- A comprehensive list of all activities required to complete the project, typically organized within a Work Breakdown Structure (WBS).
- The duration each activity will take to complete.
- The dependencies between activities.
- Logical endpoints such as milestones or deliverables.
Using these elements, CPM identifies the longest sequence of dependent activities, known as the “critical path.” This path determines the shortest possible duration to complete the project. Activities on this path are critical because any delay directly impacts the project’s completion date. Conversely, activities not on the critical path have “total float,” meaning they can be delayed without affecting the overall project timeline.
CPM in Practice
CPM’s practical application involves several steps:
- Identifying the Critical Path: By calculating the longest path of planned activities, project managers can pinpoint which activities are critical and which have float.
- Managing the Critical Path: Tools that utilize CPM can display the critical path and near-critical path activities, allowing managers to focus on tasks that will most impact the project’s completion.
- Adjusting the Schedule: Managers can shorten the critical path through techniques such as fast-tracking (performing activities in parallel) and crashing (adding resources to shorten activity durations).
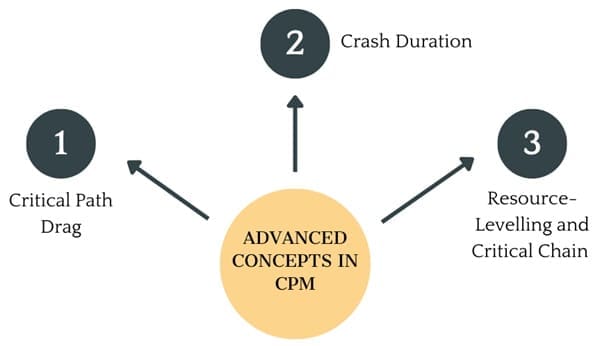
Advanced Concepts in CPM

Several advanced concepts enhance CPM’s flexibility and accuracy:
- Critical Path Drag: This metric quantifies how much activity on the critical path delays project completion. We calculate it based on the activity’s duration. We also consider the float of parallel activities.
- Crash Duration: This term refers to the shortest possible time to schedule an activity. Generally, achieving this requires allocating additional resources, often at the expense of increased costs or reduced quality.
- Resource-Leveling and Critical Chain: Modern CPM includes resource considerations, addressing bottlenecks that may cause delays. The critical chain method further protects schedules from unforeseen delays by incorporating buffers.
Final Words
Understanding and applying the Critical Path Method (CPM) helps in efficient project management, particularly in complex manufacturing processes like table production. By identifying the critical path, managers can focus on essential tasks, allocate resources effectively, and ensure timely project completion.
This method minimizes downtime, reduces costs, and maximizes productivity, proving essential for any company’s operational success.

About Six Sigma Development Solutions, Inc.
Six Sigma Development Solutions, Inc. offers onsite, public, and virtual Lean Six Sigma certification training. We are an Accredited Training Organization by the IASSC (International Association of Six Sigma Certification). We offer Lean Six Sigma Green Belt, Black Belt, and Yellow Belt, as well as LEAN certifications.
Book a Call and Let us know how we can help meet your training needs.


Good summary however no mention of how every node (except first and last) needs to have a predecessors and a successor in order for a CPM to work properly.